

Shved Supply and Demand Indicator for MT5 — smart supply and demand zones that genuinely help you read the market


The market rarely moves chaotically. Behind every impulse are areas where major participants were either actively buying or aggressively selling — this is exactly where supply and demand zones are formed. The problem is that manually finding such levels is time-consuming, subjective, and often inaccurate.
Shved Supply & Demand Indicator for MT5 automates this process: the indicator independently analyzes price structure and highlights key zones where the probability of market reaction is elevated. It is a tool equally useful for both beginners and experienced traders — beginners gain visual understanding of market structure, while advanced traders save time and eliminate subjectivity.
What Shved Supply & Demand Indicator Does
The indicator automatically builds chart zones where strong buyer or seller activity was previously observed. These are often the exact zones where powerful moves, reversals, or trend accelerations begin.
Essentially, the indicator answers the trader’s main question:
Where on the chart were major participants actually making decisions?
The algorithm analyzes:
-
price extremes
-
strength of the outgoing move
-
number of repeated zone retests
-
price reaction after touches
As a result, colored zones appear on the chart, showing potential market interest points.
How Zones Look on the Chart
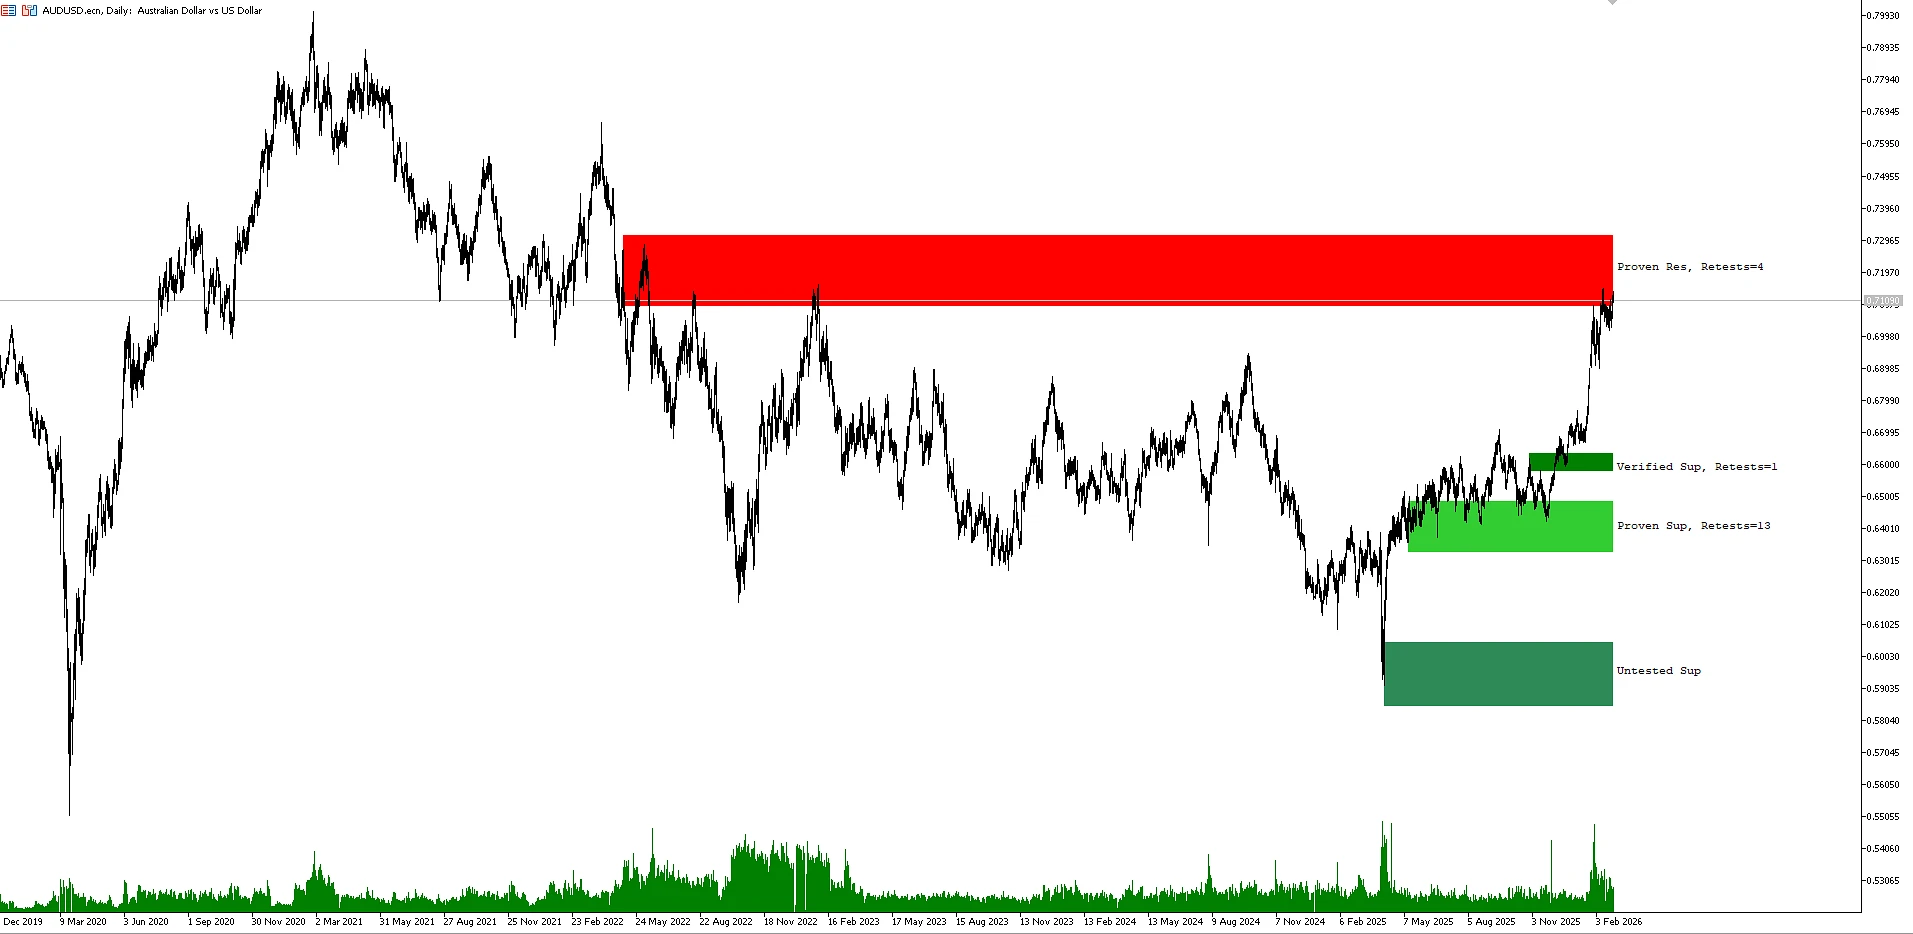
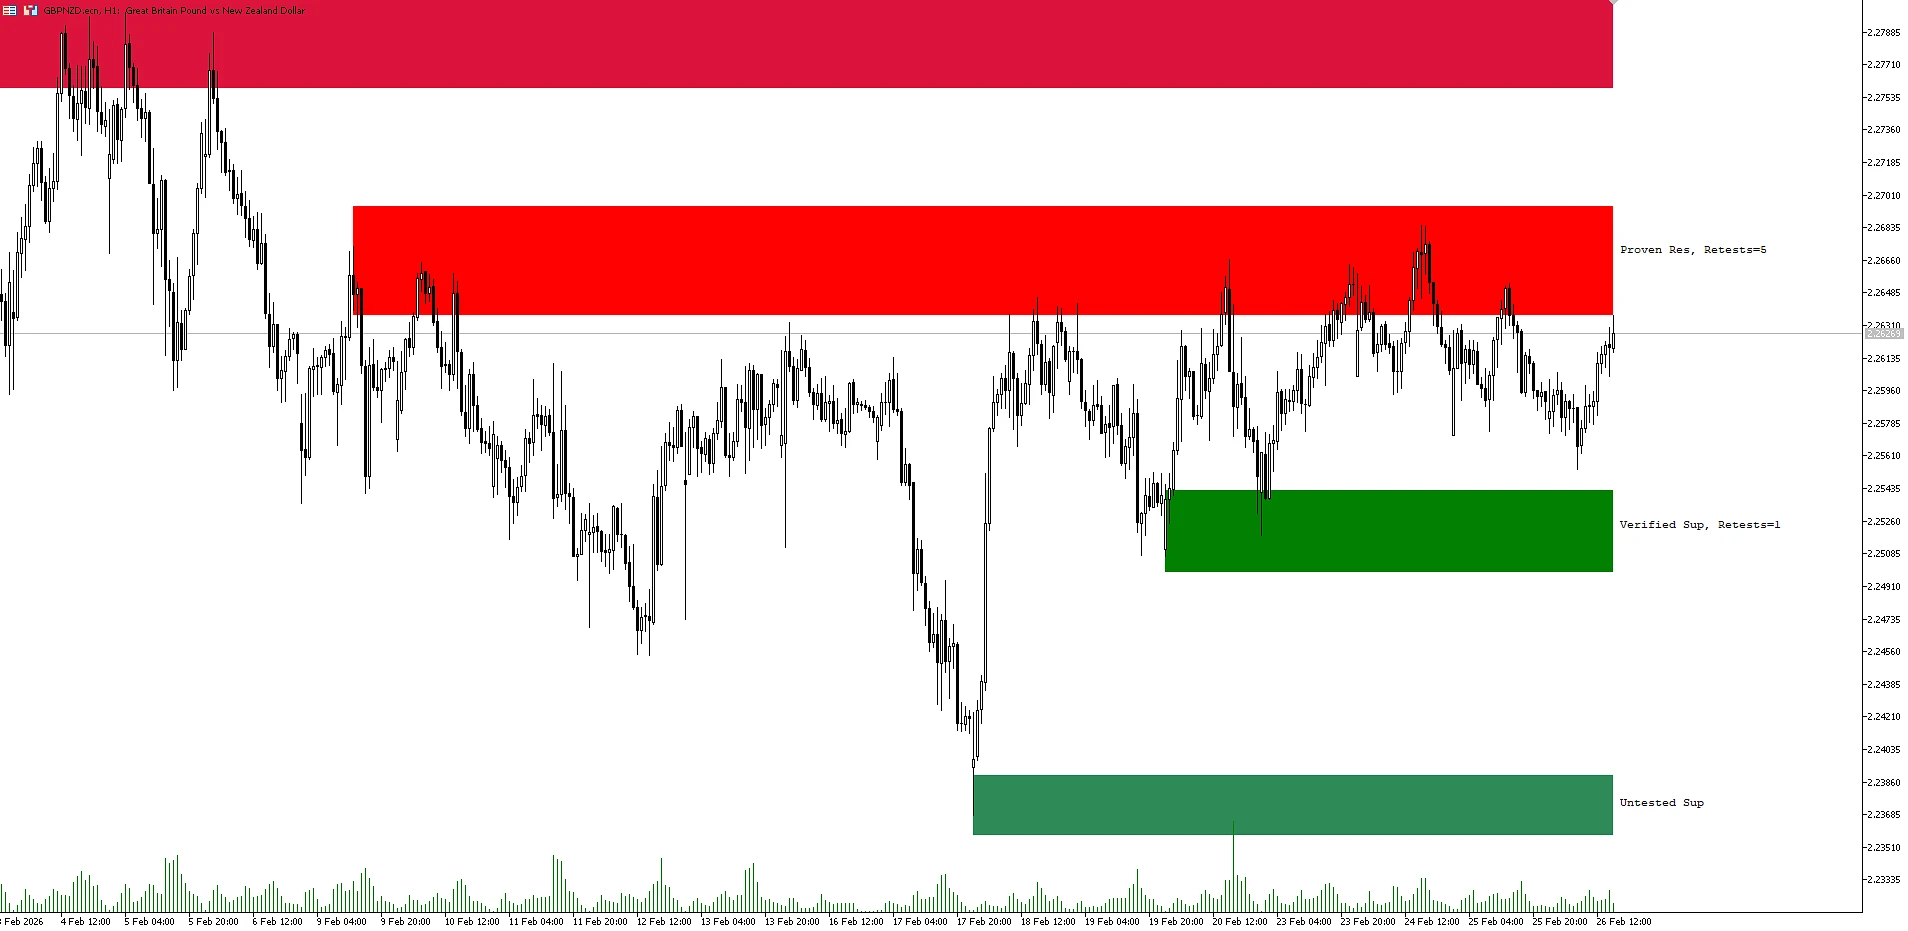
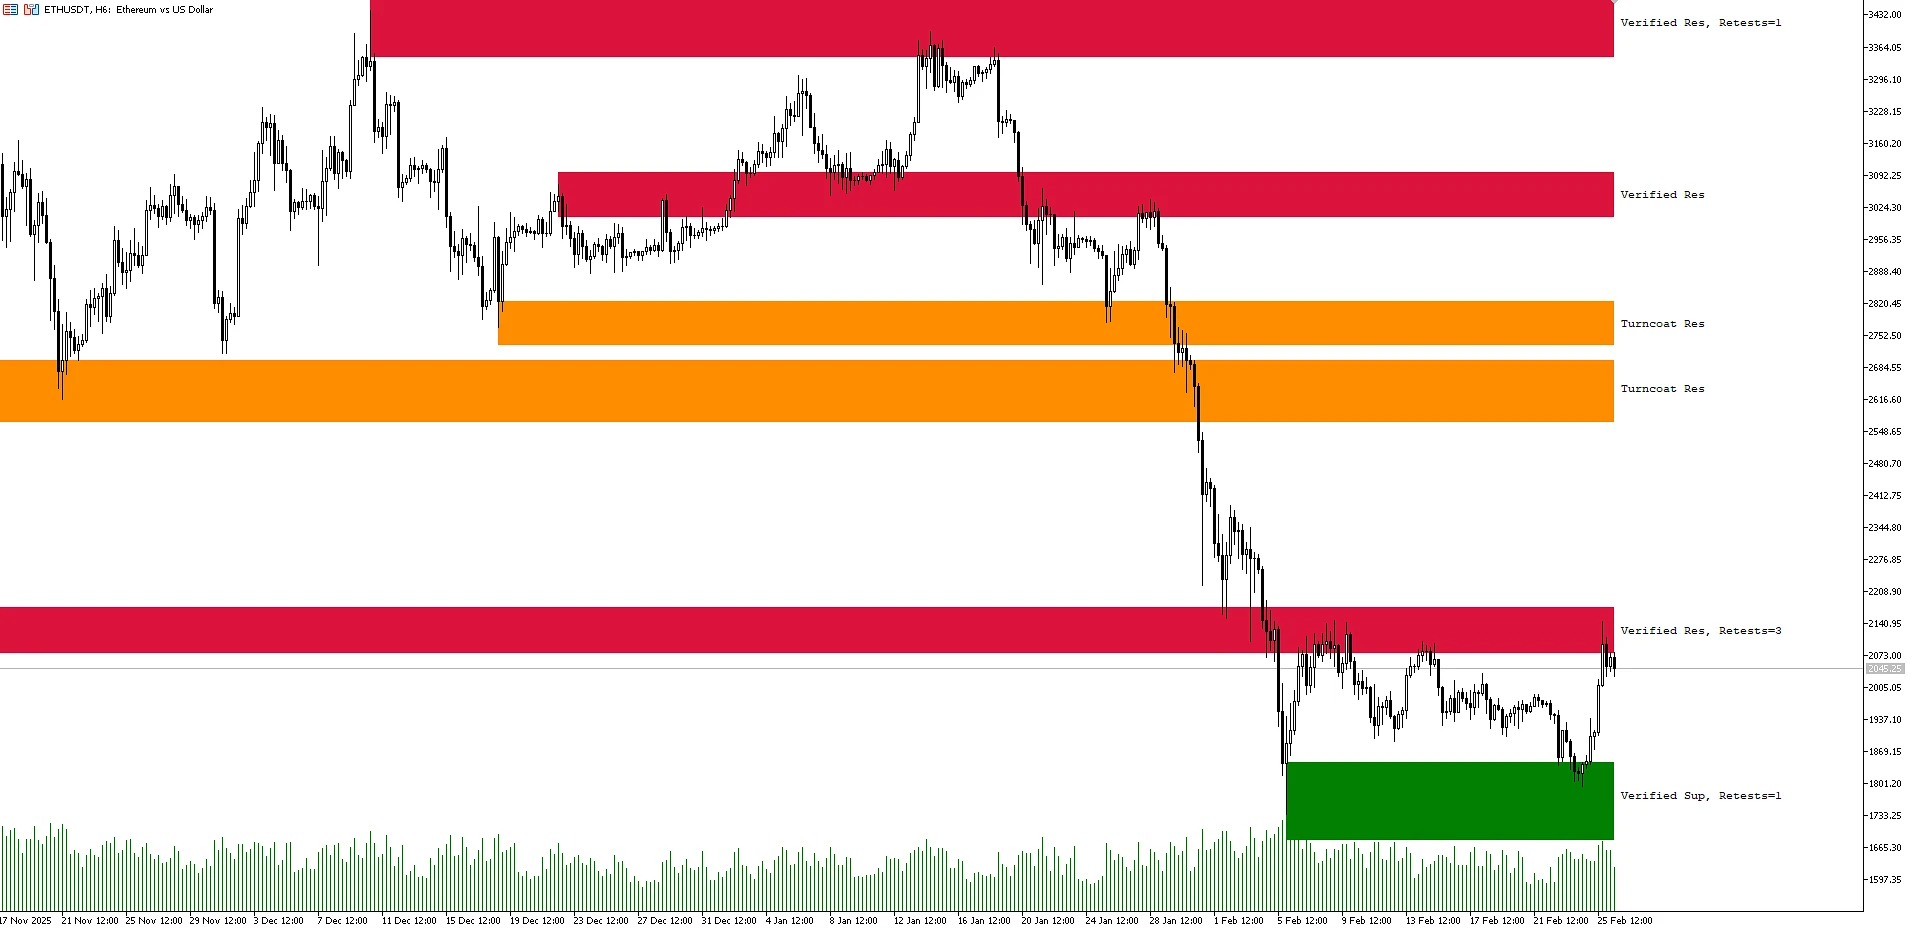
Visually, the indicator builds colored rectangles — these represent supply and demand areas:
-
🔴 red zones — supply areas (resistance, potential selling)
-
🟢 green zones — demand areas (support, potential buying)
The more often price interacted with a zone and reacted to it — the higher its significance.
Your examples clearly show:
-
resistance zones where price repeatedly reversed downward
-
confirmed support zones holding price
-
mirror levels (turncoat), where support and resistance switch roles
This type of visualization makes the indicator convenient even for beginners — market structure becomes obvious in seconds.
What Types of Zones the Indicator Builds
Shved Supply & Demand identifies 5 key zone types, and this is one of its strongest advantages.
1️⃣ Weak Zone — weak zone
A zone without a pronounced imbalance between supply and demand.
Usually used as a secondary reference point — trading from it should be done cautiously.
2️⃣ Untested Zone — untested zone
An area from which price once made a strong impulse, but has not yet returned.
Such zones are often interesting for finding first market reactions.
3️⃣ Verified Zone — verified zone
Price has already returned to the level at least twice, and the reaction was noticeable.
The more retests there are — the higher the probability of another reaction.
4️⃣ Proven Zone — proven zone
A repeatedly tested area with high trading activity.
Even if a breakout occurs — this is often where a trend reversal begins.
5️⃣ Turncoat Zone — mirror level
A classic market situation: support becomes resistance or vice versa.
These levels are especially valued by Price Action traders.
Why the Indicator Works Better on Higher Timeframes
Lower timeframes contain a lot of market noise — false breakouts, micro-movements, and random reactions.
On H1, H4, and Daily:
-
zones are formed based on more significant trading volume
-
fewer false signals
-
price structure is much cleaner
That is why professional traders often use the indicator as a contextual tool — to understand the bigger picture, while looking for entries on lower timeframes.
Indicator Settings — the Essentials Without Overload
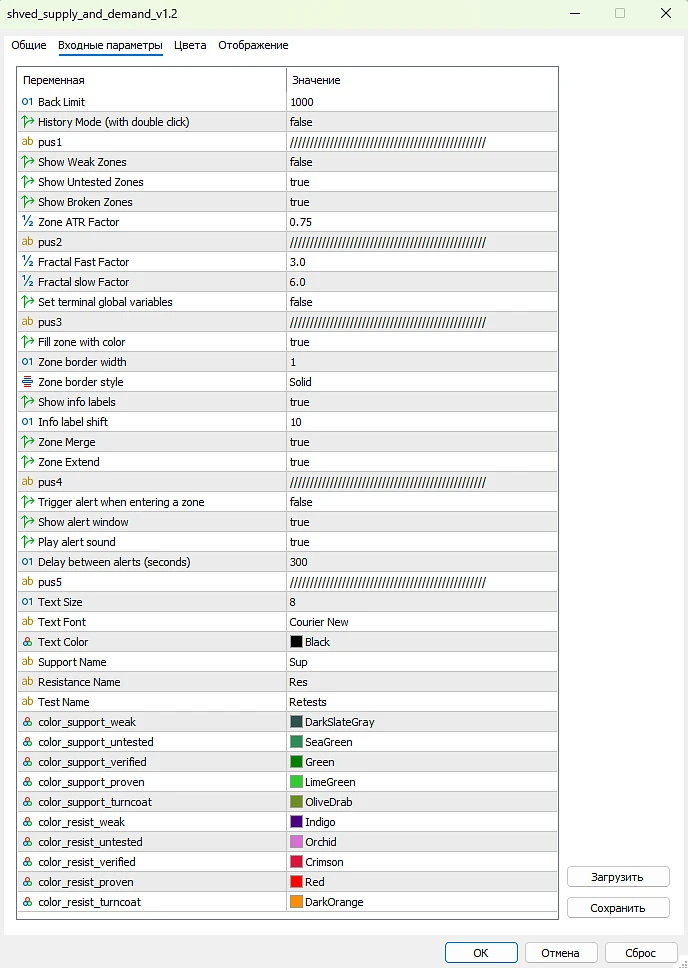
Shved Supply & Demand has many parameters, but the key ones are easy to understand:
Main Zone Parameters
-
Back Limit — number of candles for analysis
-
Zone fuzzfactor — zone height
-
Zone merge / extend — merging nearby zones
-
Zone solid / line width / style — visual appearance of zones
Display
-
enable/disable weak, mirror, and untested zones
-
display text and retest count
Fractals
Used for finding extremes and improving construction accuracy.
Alerts
-
pop-up notifications
-
sound alerts
-
delay between notifications
This is convenient if you do not want to constantly watch the monitor.